
How to Zero a Pistol Optic | Quick & Simple Guide
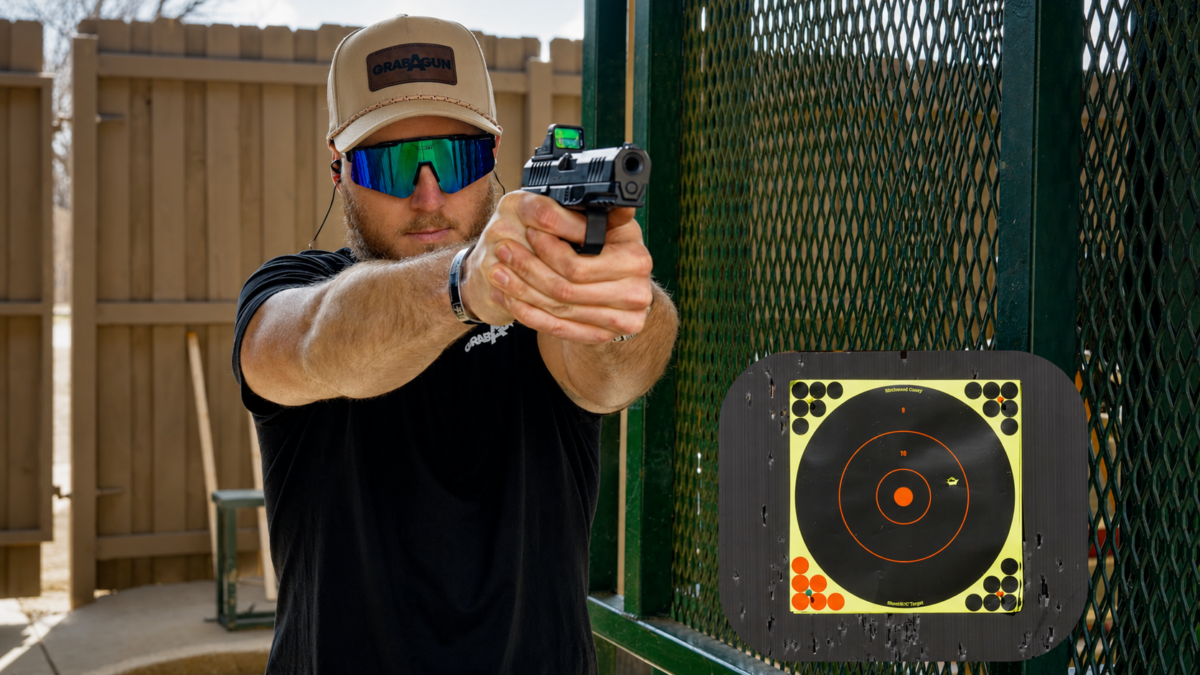
“How do you zero a pistol optic” is one of the most common questions asked after mounting a red dot or green dot on a handgun. Is it complicated? No. The process is simple when you slow down, shoot in small groups, make minor adjustments, and confirm your point of impact before calling it done.
A pistol optic does not make anyone a better shooter by itself. That part matters. A zeroed dot gives you a clearer aiming reference, but fundamentals still do the heavy lifting. Grip, trigger control, sight tracking, stance, follow-through, and honest range practice are what turn a good setup into better shooting. As we like to say: drills over drip.
In the video that accompanies this blog, we walk through a simple range process using a Rost Martin pistol equipped with a Viridian RFX11 green dot. The same basic process applies to many optics-ready pistols and handgun red dots, but always check your firearm manual, optic manual, and local range rules before shooting.
Before You Start: Safety Comes First
Before you start zeroing a red dot sight, handle the firearm safely and deliberately. Keep the muzzle pointed in a safe direction, keep your finger off the trigger until you are ready to fire, and know your target and what is beyond it.
You should also confirm that your optic is properly mounted before firing. Make sure the optic is seated correctly, the correct screws or plate are being used, and the optic is secured according to the manufacturer’s instructions. If the optic shifts under recoil, your zero will move with it.
For our example, the pistol is already set up with a Viridian RFX11 green dot. The dot is already on, so there is no manual on button to press in the demonstration. Some optics use buttons, some use shake-awake technology, and some use automatic activation. Know how your optic works before you get to the range.
How to Zero a Pistol Optic With Three-Round Groups
The easiest way to zero a pistol optic is to shoot controlled three-round groups, look at where the rounds are landing, adjust the optic, and repeat until the group lands where you want it.
For the example in our video, the process starts with three rounds of 9mm loaded into the magazine. Three rounds are enough to show a pattern without burning through unnecessary ammo. One shot can be misleading. Two shots can still leave you guessing. Three shots usually give you a better read on where the pistol and optic are printing together.
Here is the basic flow:
- Load three rounds.
- Fire a careful three-shot group at the target.
- Check where the group landed compared to your aiming point.
- Make small windage or elevation adjustments.
- Load another three rounds.
- Shoot another group.
- Repeat until the group is centered.
- Fire one final three-round group to confirm.
That last confirmation group matters. A quick adjustment might look right after one group, but you want to prove it. Good zeroing is not about chasing every single hole in the paper. It is about watching the group move and making measured corrections.
Read the Group Before You Touch the Optic
After the first three shots in the video, the impacts are a little right of the target. That tells us the dot and point of impact need to be brought into agreement.
This is where shooters sometimes get impatient. They fire a few rounds, see impacts off-center, and start spinning adjustment screws too aggressively. That can make the process take longer. Instead, read the group as a group. Are all three shots generally right? Are they high? Low? Spread out because of fundamentals? Or is one shot clearly pulled?
If your group is tight but off-center, your optic likely needs adjustment. If your group is wide, inconsistent, or scattered, slow down and focus on grip and trigger press before making big optic changes. A loose group can make you adjust the optic when the real issue is inconsistent shooting.
A pistol red dot zero is only useful if the shooter is doing their part. That does not mean you need to be a competition shooter. It means you need to shoot deliberately enough that the target tells the truth.
Make Small Windage Adjustments
Windage controls left and right movement. In the video, the first group lands slightly right. The provided Allen key is used to make a few small clicks of adjustment. The important word is “few.”
When adjusting, the rule is simple: chase the bullet. Move your point of aim in the same direction your shots are landing. If your group is hitting left, adjust left. If it’s hitting right, adjust right. This trips up a lot of new shooters, but thinking of it as “chasing” where the bullet went makes it intuitive.
Most pistol optics adjust in clicks. Depending on the optic, each click moves the point of impact a specific amount at a specific distance. That amount can vary, so check your optic manual. The safest habit is to make small changes, shoot another group, and observe what changed.
Do not rush. You should be able to see the group move as you adjust and reshoot. That is the whole point of using repeatable groups. It helps you avoid guessing.
Make Small Elevation Adjustments
Elevation controls up and down movement. Later in the video, the group looks a little high, so another small adjustment is made to dial the optic in more precisely.
When your shots are high or low, think in terms of matching the dot to where the rounds are actually landing. The goal is simple: when you aim at the center of the target, your rounds should land where the dot is telling you they will land.
Again, small adjustments are your friend. If you make a large adjustment after every group, you can overshoot the correct zero and end up moving back and forth across the target. A few clicks, another group, and another look at the target will usually get you there faster.
Why Three-Round Confirmation Matters
Once the impacts look centered, fire another three-round group to confirm. This is the step many shooters skip, and it is the step that gives you confidence.
A confirmed zero means you did not just get lucky with one group. It means the optic, pistol, ammo, and shooter are working together consistently enough to trust the result.
That does not mean the pistol will magically shoot perfectly forever. Screws can loosen. Batteries can weaken. Ammo can change. Your grip can change. Environmental conditions can change. If you carry, compete, train, or shoot often, it is smart to confirm your zero periodically.
What Distance Should You Use To Zero A Pistol Red Dot?
A practical pistol red dot zero is usually done at a realistic handgun distance, based on how the firearm will be used. Many shooters choose a close-to-moderate range distance because most handgun training happens inside that window.
The exact distance is less important than consistency. Pick a distance that matches your use case, keep the target clear, and shoot from a stable position. If you zero at one distance and then shoot much closer or farther away, your point of impact can shift slightly in relation to the dot. That is normal.
For newer shooters, the smartest move is to zero at a manageable distance where you can shoot a consistent group. Once the optic is close, you can confirm at additional distances and learn how your pistol, optic, and ammo behave together.
What If Your Group Will Not Tighten Up?
If your groups are not consistent, stop adjusting the optic for a moment. A zeroing session can turn frustrating when the shooter tries to fix fundamentals with hardware.
Here are a few things to check:
- Is your grip consistent from shot to shot?
- Are you pressing the trigger straight to the rear?
- Are you watching the dot through recoil?
- Are you rushing the shot?
- Is the optic mounted securely?
- Are you using the same ammunition throughout the process?
A red dot is honest. It shows movement that iron sights can sometimes hide. That can feel discouraging at first, but it is useful feedback. If the dot jumps, dips, or streaks during the trigger press, pay attention. The optic is showing you what your hands are doing.
A Zeroed Optic Does Not Replace Practice
This is the biggest takeaway from the video: a zeroed optic does not make someone a good shooter. Practice and fundamentals do.
The optic helps you aim. It does not build your grip. It does not manage recoil for you. It does not press the trigger cleanly. It does not make decisions. It simply gives you a visible aiming reference, and when properly zeroed, that reference should match your point of impact.
That is good news. It means improvement is still in your control. The more you train, the more useful the optic becomes. Dry-fire practice, live-fire drills, slow groups, draw practice where legal and allowed, and range time all help build the skill that the gear supports.
Choosing the Right Pistol Optic Setup
The pistol in the video uses a Viridian RFX11 green dot. GrabAGun carries red dot sights from brands including Trijicon, EOTech, Sig Sauer, Leupold, Crimson Trace, Canik, and Viridian, with options for carry pistols, competition guns, carbines, and other platforms.
When choosing an optic, pay close attention to footprint, dot size, window size, brightness settings, battery access, durability, and whether the optic fits your pistol directly or requires a mounting plate.
A great optic is only great for your pistol if it mounts correctly and stays secure under recoil. Before buying, check the pistol’s optic cut, plate system, screw requirements, and manufacturer guidance.
GrabAGun sells many great products from Viridian and other trusted optic brands, so shoppers can compare pistol red dots, handgun sights, mounting options, and compatible accessories in one place.
Simple Range Checklist For Zeroing Your Pistol Optic
Before you head to the range, pack with purpose. A smooth zeroing session does not require a huge gear list, but it does help to have the basics ready.
Bring your pistol, mounted optic, correct ammunition, magazines, eye and ear protection, target, marker, optic adjustment tool, and any manual or adjustment reference for the optic. If your optic uses a battery, consider bringing a spare. If your setup uses specific screws or plates, inspect them before the trip.
At the range, take your time. Load three rounds, shoot a careful group, adjust, and repeat. Watch the group move. Confirm when it looks right. Then keep training.
That is the whole process. Simple does not mean careless. Simple means repeatable.
Keep The Dot Honest And Keep Training
Learning How to zero a pistol optic is less about chasing perfection and more about building a repeatable process. Shoot a three-round group. Read the target. Make a small adjustment. Shoot again. Confirm your zero. Then put in the practice that makes the optic matter.
A properly zeroed dot helps your pistol send rounds where you expect them to go, but the shooter still does the work. Fundamentals, repetition, and honest feedback are what make the difference.
For pistol optics, handgun sights, red dots, ammo, and optics-ready handguns, shop GrabAGun and get the gear you need for your next range session.
FAQs
How Many Rounds Does It Take To Zero A Pistol Optic?
You can often get close with three-round groups, but the total round count depends on how far off the optic is when you start and how consistent your groups are. Plan to shoot several three-round groups so you can adjust and confirm without rushing.
Do I Need A Special Tool To Adjust A Pistol Red Dot?
Most pistol optics require a small adjustment tool, flathead tool, or Allen key. In the video, the provided Allen key is used to adjust the optic. Always use the correct tool so you do not damage the adjustment screws.
Why Is My Pistol Red Dot Still Off After I Adjust It?
Your red dot may still be off if the optic is not mounted securely, the adjustment was too large or too small, the ammo changed, or the group was affected by grip and trigger control. Shoot controlled groups before making another adjustment.
Does A Zeroed Pistol Optic Make You More Accurate?
A zeroed optic helps align your aiming point with your point of impact, but it does not replace fundamentals. Grip, trigger control, stance, follow-through, and regular practice are still what make you a better shooter.